Author: Mahdy Ghane
Solution Architect, Data & Dynamics
Long View
One of the common questions asked by Long View Systems’ clients when evaluating Microsoft Business Central SaaS is, "Can we restrict user access to Business Central based on IP or location?" Our response is that it is currently not possible to achieve this using Business Central functions or Admin Center. However, it can be accomplished by utilizing the Conditional Access function of Azure Active Directory.
In this blog post we cover steps to activate Conditional Access on Azure Active Directory.
Pre-requestions:
- Business Central
- Azure AD Premium P1 or P2 license
- Admin access to Azure AD (not Business Central)
Let’s get started
Go to your Azure Portal ( https://portal.azure.com/ ) then in Azure Services click on Azure Active Directory.
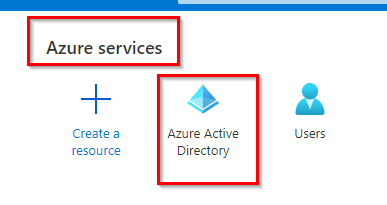
Make sure you have “Azure AD Premium P1 or P2 license”.

Then from left panel under Manage Click Security.

Then from left panel Protect -> Conditional Access.
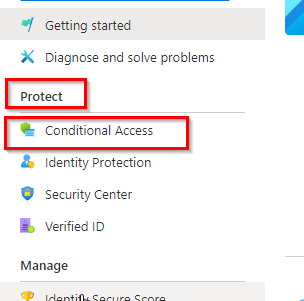
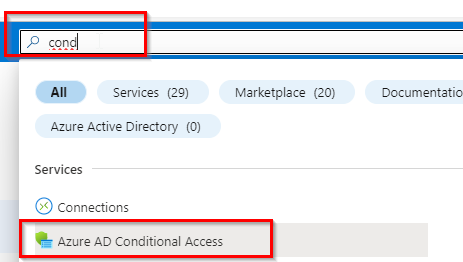
Alternatively from the main page you can search for Azure AD Conditional Access and go to this page.
Then from left panel under Manage select Named Locations.
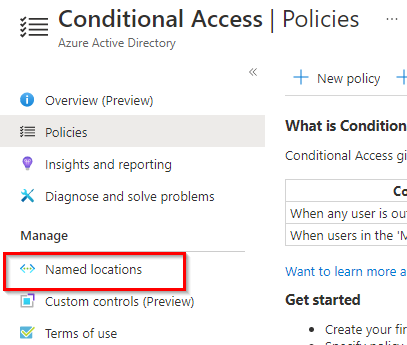
From top of the page you have two options:
- Countries location : here you can select countries to access
- IP ranges locations : if you want to define a range of IP to access your Business Central (such as your office network).
More information available here : Using the location condition in a Conditional Access policy
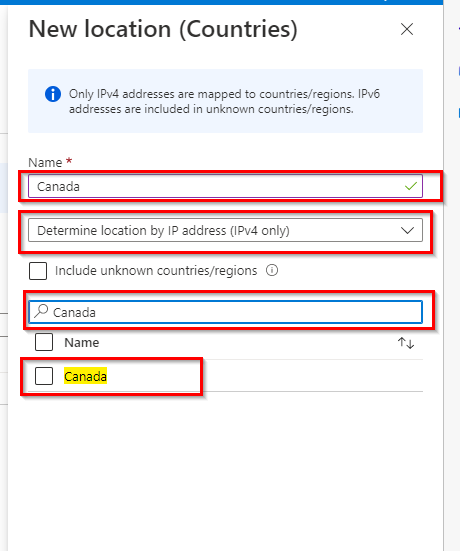
For this article use Countries location:

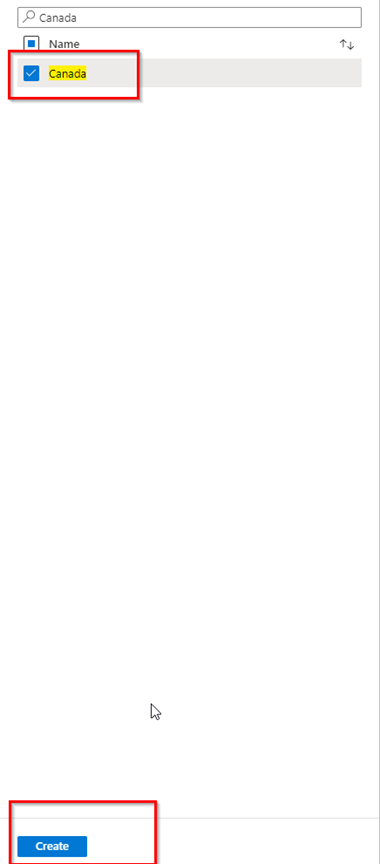
A Location named Canada was created and subsequently selected. Additional countries can be added if required, or different names can be created. It should be noted that at a later stage in the process, Access can be granted or blocked from this location.

From top of the page click on Conditional Access.

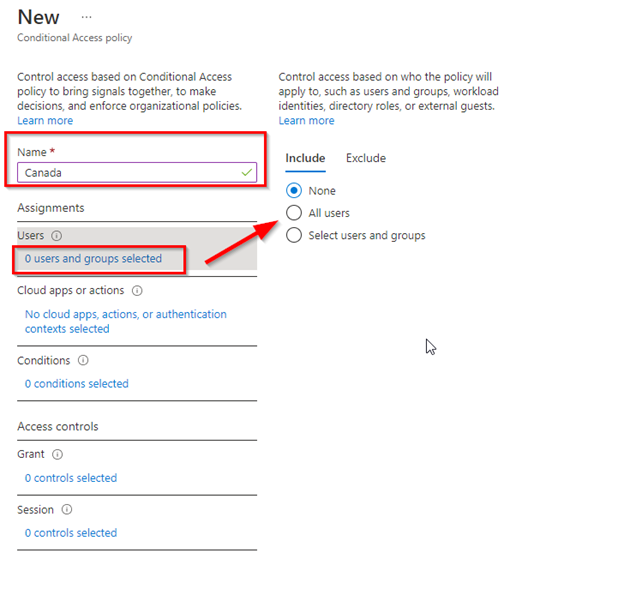
Then click on Create New policy.

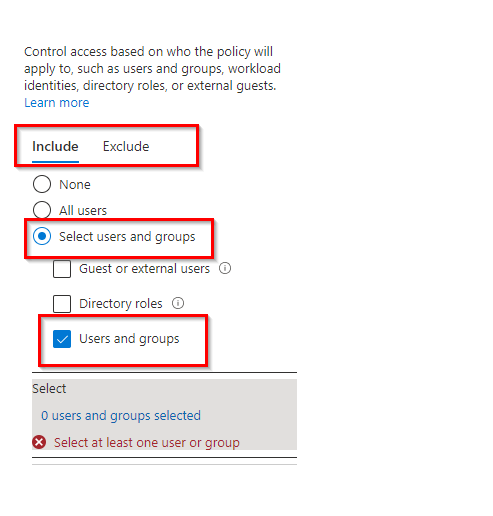
Select the name for the new policy. Then click on user and group selected. From here select one user or multiple users, or user group to limit access to Business Central only from Canada, selected country or IP range. Users can be include or exclude as well.
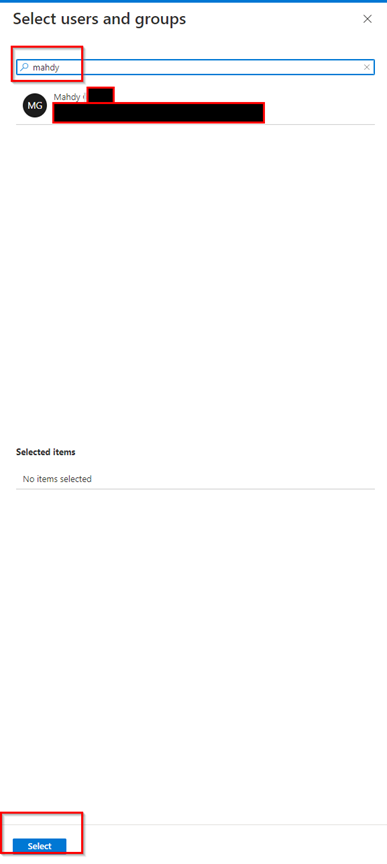
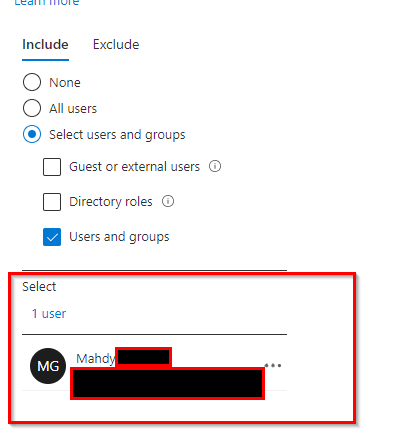
Now select “Cloud apps or actions”.
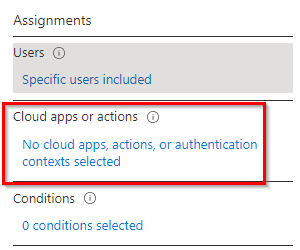
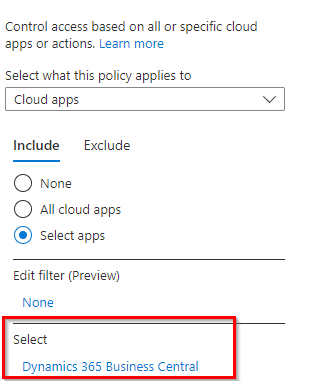
Then select “Select apps” and click on “None”.
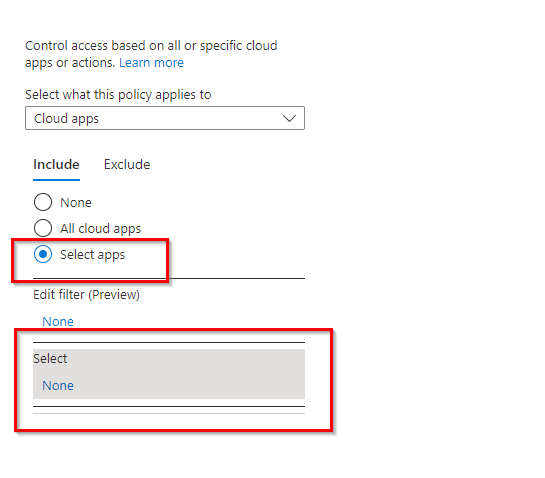
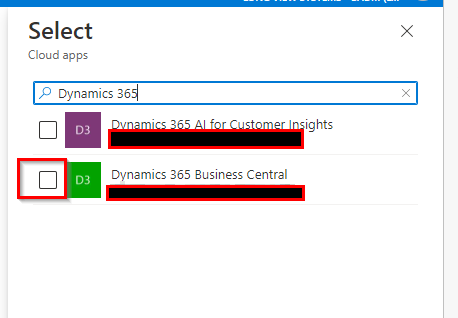
From the list search for Business Central or Dynamics 365 Business Central and select.
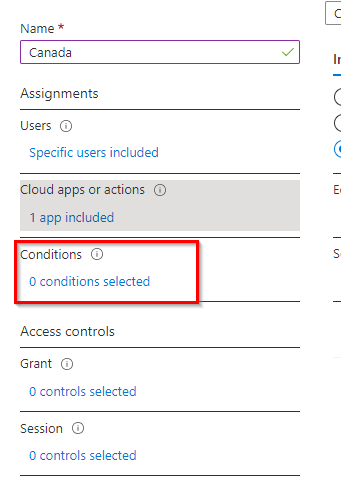
Click on 0 conditions selected.
Then under Locations click on “Not configured”.
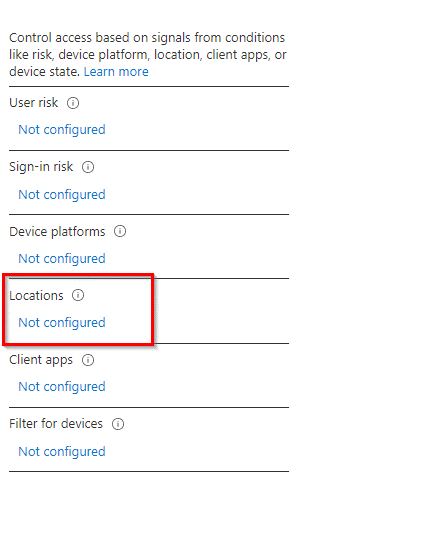
Turn on Configure then select Selected Locations and click None.
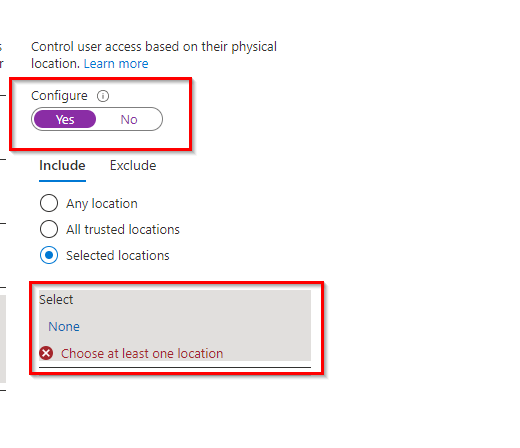
Then from the list select Locations setup previously. In this case Canada.

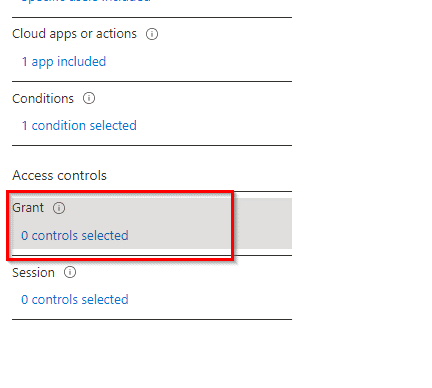
Then from Grant section click on 0 controls selected and define if you want to Grant Access from that Location or Block Access from that location.

From the bottom of the page select Enable policy “on” then click create.

That’s it. You've successful Blocked or Grant access from specific locations or IP address. Usually, between 15 to 45 minutes before this take an effect.
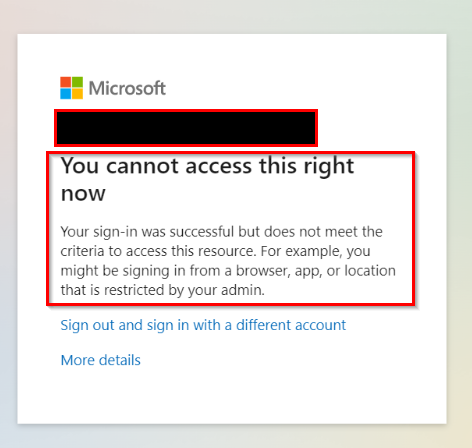
If a user tries to access Business Central from an unauthorized location, it will prompt the following error:

Subscribe to our newsletter for the latest updates.